Wednesday, February 16, 2011

If at First You Don't Succeed...

In light of Monday's sugar cookie blunder, here is my second attempt at cooking making this week.

This time I went with a peanut butter chocolate chip cookie and was very pleased! I took them right out of the oven and over to my bestie's house. She was having quite the challenging day and the combo of warm peanut butter and chocolate could only help, right?

Though the efficacy of cookies in solving all of my friend's problems is impossible to confirm (or deny), I can at least say that I have emerged from the slump of cookie failure.


Peanut Buttery Goodness Chocolate Chip Cookies

Ingredients

  • 1/2 cup butter, softened
  • 1/2 cup peanut butter
  • 1 cup packed brown sugar
  • 1/2 cup white sugar
  • 2 eggs
  • 2 tablespoons honey
  • 2 tablespoons water
  • 2 teaspoons vanilla extract
  • 2 1/2 cups all-purpose flour
  • 1 teaspoon baking soda
  • 1/2 teaspoon salt
  • 2 cups semisweet chocolate chips

  • Directions
  1. Preheat oven to 375 degrees F
  2. In a large bowl, cream together the butter, peanut butter, brown sugar, and white sugar until smooth. Beat in the eggs one at a time, then stir in the honey, water, and vanilla. Combine the flour, baking soda, and salt; stir into the peanut butter mixture. Fold in chocolate chunks. Drop by spoonfuls 2 inches apart onto parchment lined baking sheets.
  3. Bake for 10-12 minutes in the preheated oven, or until edges are golden. Allow cookies to cool for 1 minute on the cookie sheet before removing to wire racks to cool completely.
*Next time I think that I'll substitute 1 cup of chocolate chips with peanut butter chips to add to the peanut butter gooey deliciousness.

Monday, February 14, 2011

Just Another Day (?)

Today, for some reason, I was inclined to cut out tissue paper hearts and bake up some sugar cookies...odd.

I wish I could give a glowing report of my sugar cookie success, but alas, my efforts did not pay off as I had hoped. Thin, crispy cookies and painfully sweet icing. Thankfully, I wasn't trying to impress anyone with them- except my sister.

Next time I vow to:
1) Use the electric mixer (as opposed to the old-fashioned elbow grease method)
2) Not roll the dough so thin before making cutouts and baking.

Cookie blunder aside, here's my festive little centerpiece:


Satisfaction

There's nothing like the feeling that a finished project brings!

I am looking forward to reuniting my brother with his newly customized shoes. I worked on painting these two days in a row and committed roughly 5 hours each day.


I have to say that I am very satisfied with the outcome and am standing by for my next source of inspiration!

Wednesday, February 9, 2011

A Shoe Story

Seeing as I have SO much time on my hands I took on another project. This time it was for my dear brother. Yes, this brother. These were the shoes he wore on his wedding day and he wanted me to create a custom design for him.


He sent a link for inspiration and I got started!

A blank canvas (shoe)


supplies: acrylic paint, textile medium, masking tape, newspaper, pencil, paint brush


The Finished Product (right shoe):


One down, one to go!

Snack Time

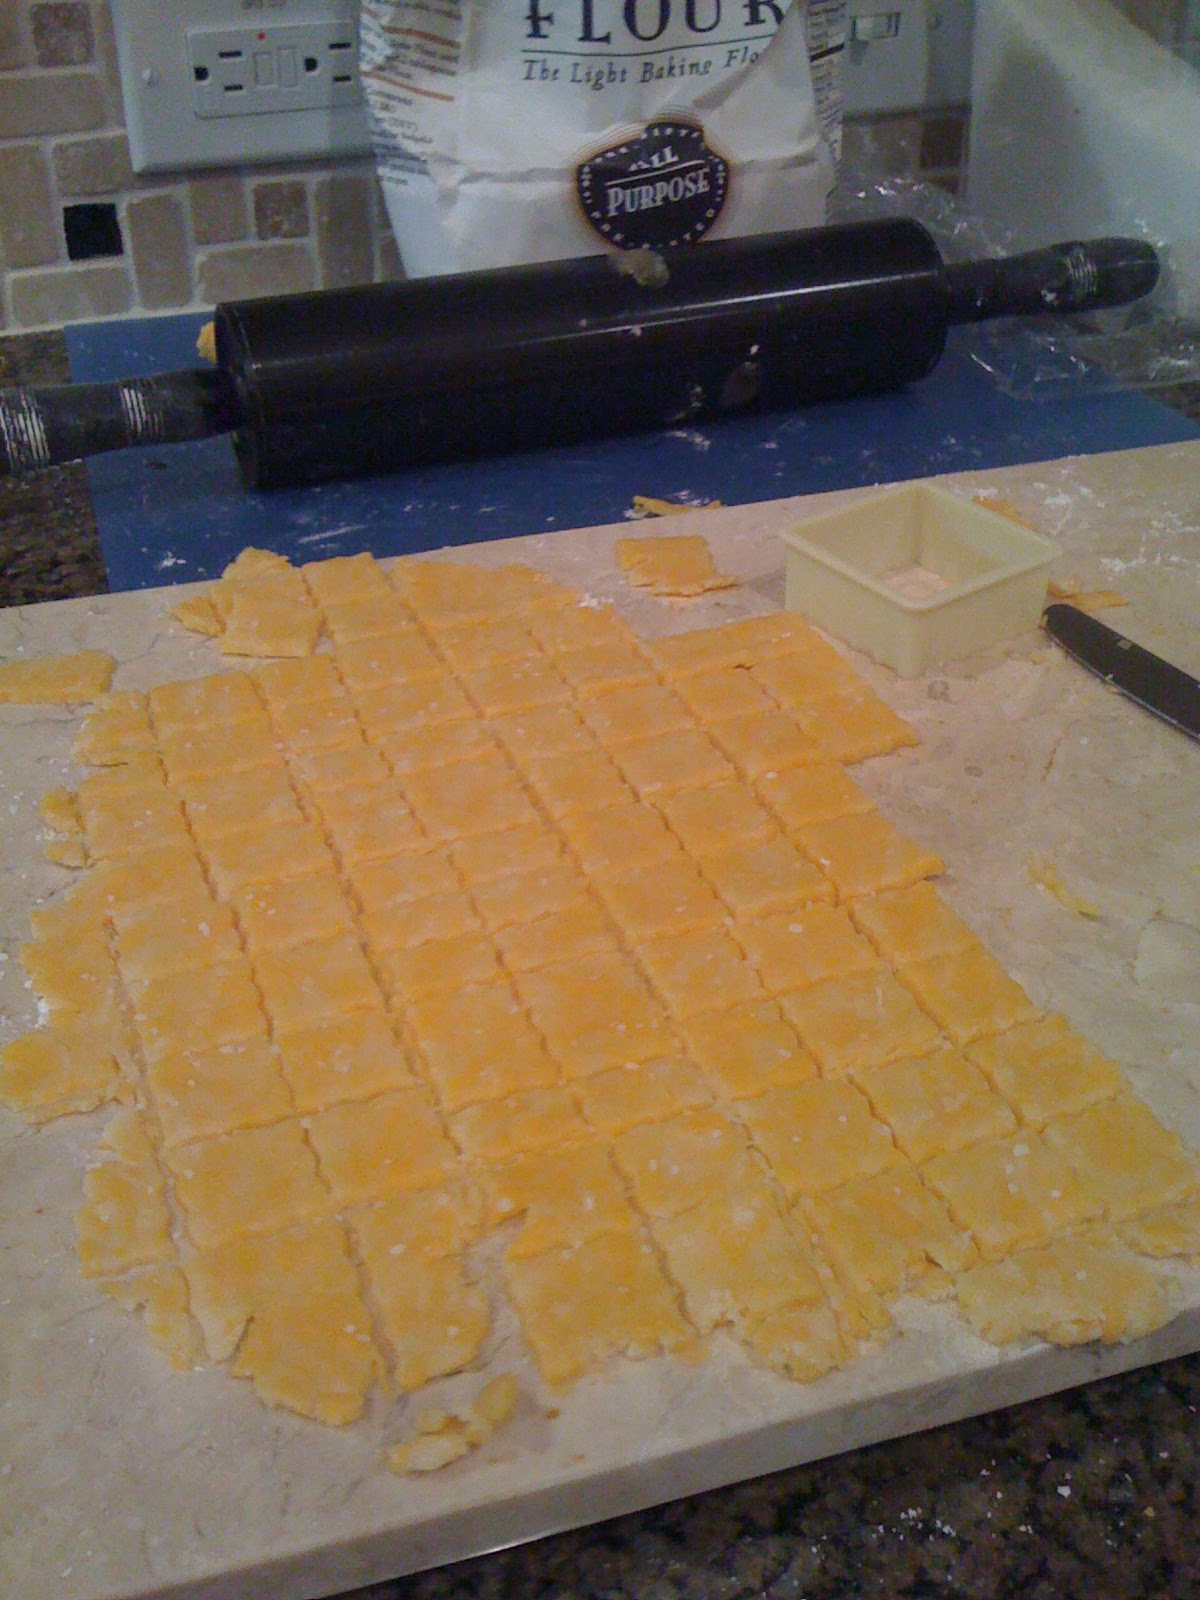
Homemade Cheez-Its! I was thrilled to find a recipe on one of my favorite killing-time websites/magazines readymade.com. I loved the taste of the real cheese and the short ingredient list!

Try 'em, you'll love 'em :)


Homemade Cheez-Its**
8 oz extra-sharp cheddar cheese, coarsely shredded
½ stick unsalted butter, at room temperature
1 t kosher salt
1 c flour
2 T ice water

In the bowl of a stand mixer fitted with the paddle attachment, mix the cheddar, butter, and salt until soft and combined. Add the flour and mix on low speed (the dough will be dry and pebbly). Slowly add the water and continue to mix as the dough forms a ball.

Pat the dough into a disk, wrap tightly with plastic wrap, and refrigerate for at least an hour.

Preheat the oven to 375˚F. Line two baking sheets with parchment paper or Silpats.

Divide the dough into two pieces and roll each into a very thin (1/8 inch or less) 10 x 12-inch rectangle. Using a fluted pastry cutter, cut the rectangles into 1-inch squares, then transfer to the baking sheets. Use the tip of a chopstick to punch a hole into the center of each square.

Bake for 15-17 minutes or until puffed and browning at the edges. Watch carefully, as the high fat content of the crackers makes it a fine line between golden delicious and burnt. Immediately move the crackers to racks to cool.

**I had some variations: I don't have a stand mixer, so I just used my little Sunbeam hand mixer. Also, I found that I needed to add an extra tablespoon of water to get the dough to come together.

My New FAVORITE Drink

This is my new favorite! With fresh lime juice, mint, and a little bit of fiz- what's not to like?!


The BEST Mojito
(serves 2)

Ice
3 ounces rum (I used Foursquare spiced rum)
6 fresh mint sprigs, 2 for garnish
3 tablespoons fresh lime juice
2 tablespoons sugar
Club soda
2 slices lime

Place ice in shaker and add in the rum, 4 mint sprigs, lime juice and sugar. Use the back end of a wooden spoon and mash the mint leaves to bruise them slightly. Shake well and serve over ice in a glass. Top off the glass with club soda.

Add a slice of lime and a sprig of mint as garnish if you want to fancy it up.

DIY birthday gifts that always please

One of my favorite things to do on family members' birthdays is to make them a meal as their gift. My brother turned 23 last month and I gave the option to make a request. His gift of choice was pot roast. I had used this recipe before and had great results. This time though, I substituted one of the cans of soup for cream of mushroom soup. The golden mushroom soup makes for a really delicious gravy. Definitely one of my old standbys!


Here are the recipes I used:
Awesome Corn Bread


We finished off the evening with a game of Scrabble.

My brother is quite special ;)